Am I really suggesting to make cheese at home?! Apparently it is much more simple than it sounds. Paneer, the most common cheese in Indian cuisine is prepared from only two ingredients. Paneer comes in two versions – firm Paneer and soft Paneer. The soft Paneer is less known outside of India but it is very common in Indian cooking both in spicy dishes, patties and even in deserts. This soft version is actually identical to Ricotta cheese… yep, making Ricotta cheese at home is easy peasy!
In many places you can find fresh Paneer cheese (usually the firm version) in any supermarket. In Israel that is not the case and the only option I found is to buy frozen and somewhat depressing Paneer cubes in the few Indian grocery shops here. But no worries! making Paneer at home is such a simple process that doesn’t require and special skills or dishes and is so satisfying 🙂 You can also make a large amount and freeze for a two-three months.
The Paneer cubes can be added to any dish with/without gravy, to a stir fry or even grilled on skewers. It has a neutral milky taste and a fun bite-able texture.
Prep time: 10 minutes + 1/2 hour to 2 hours wait time
Cook time: 15-20 minutes
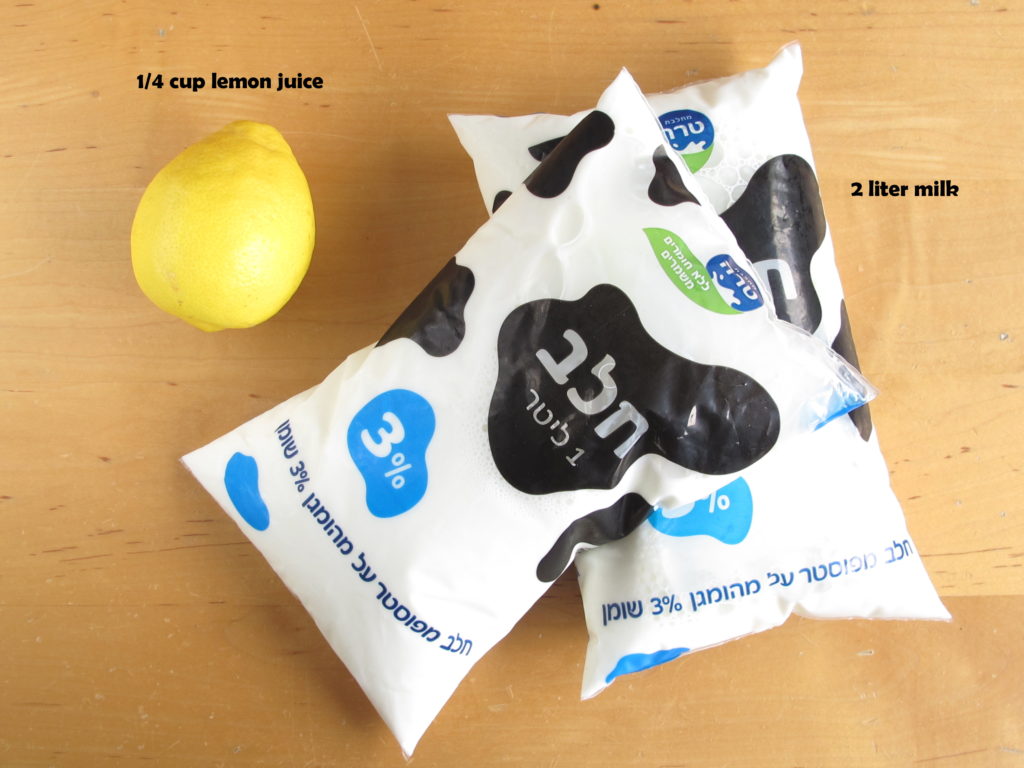
Ingredients (for ~350 gr hard Paneer)
- 2 liter milk (full fat)
- 1/4 cup lemon juice
- pinch of salt – optional
Directions
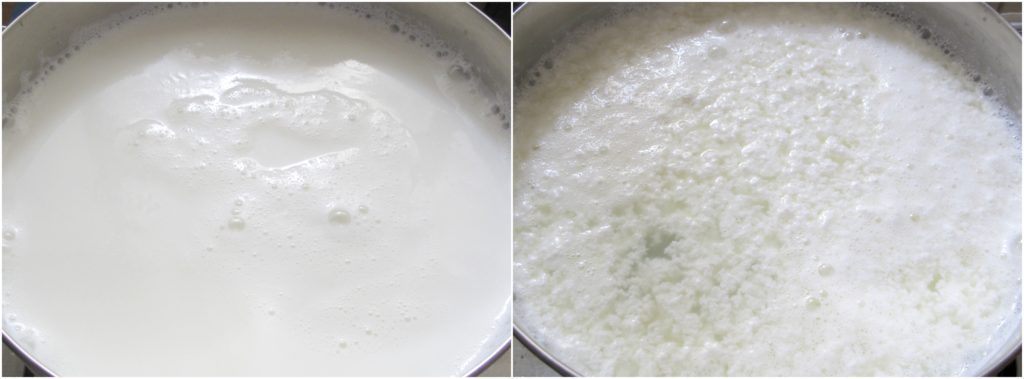
Place the milk in a wide pot on low-medium heat and bring to a boil. Stir occasionally so the milk what stick to the bottom of the pan and burn.
When the milk is boiling add about 1/4 cup lemon juice. Add the lemon juice gradually, mix after each addition and check if the milk has started separating. If it didn’t happen add some more lemon juice, mix and wait for the milk to separate. Repeat until the milk separates, you might need a little less or a little more than 1/4 cup of lemon juice.
You can’t miss the milk separation, once it will happen you’ll know that this is it 🙂 Lumps will starts forming, starting with small grains that will slowly become larger lumps and between them you’ll notice a cloudy greenish liquid. The separation of the milk to cheese lumps and greenish liquid should be complete so just lower the flame and wait for another minute or two.
While the milk is coming to a boil organize a strainer with a cheese cloth. For cheese cloth you can use clean white baby cloth diapers or if you haven’t heard of those a Kefiyyeh will also work here.
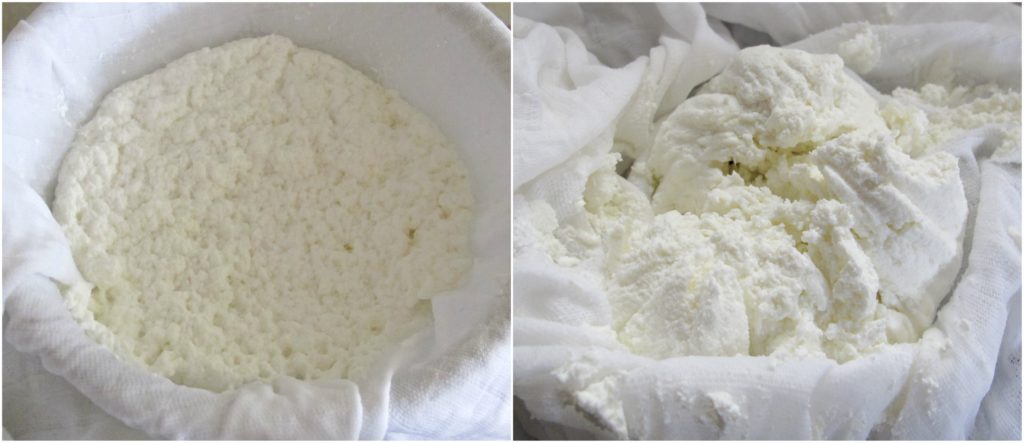
Place the strain with the cloth in the sink and pour the separated milk on top. The greenish liquid will be gone and you’ll get a soft Paneer cheese. By the way, this greenish liquid has a name – it is called “cheese water” or “whey”. It has lots of uses both in cooking, baking, body care, gardening and many more.
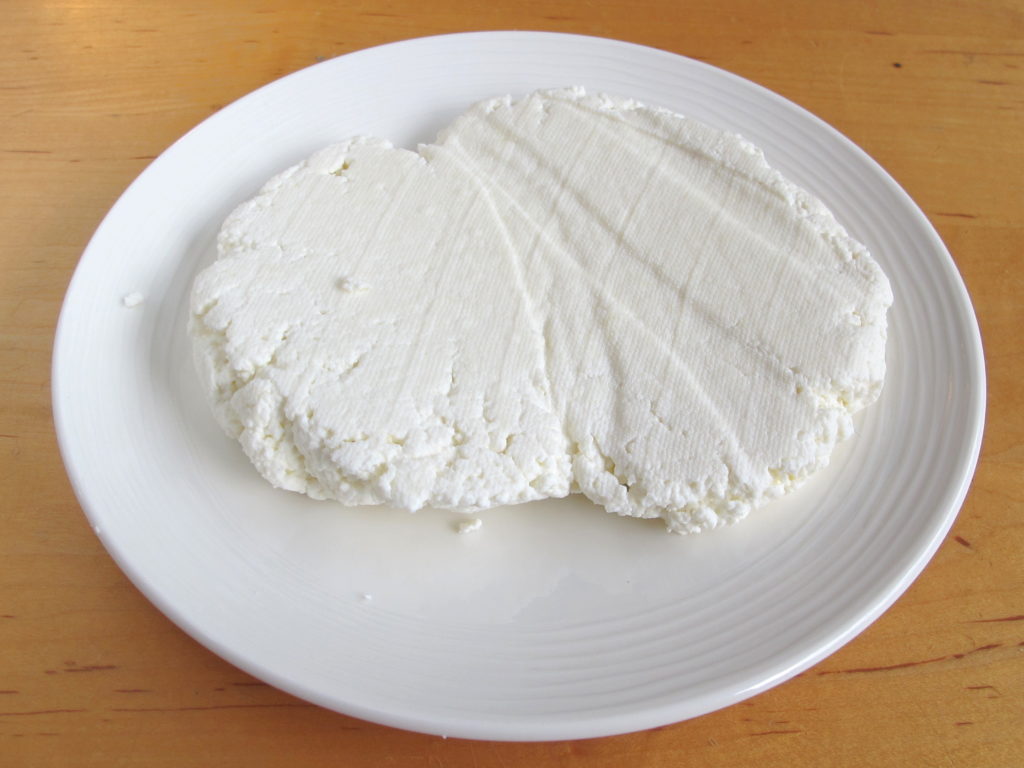
Gently wash the Paneer with tap water – it will take the sour taste of lemon out and will cool down the cheese. At this stage you can sprinkle some salt and gently mix but it is completely optional and I usually skip it. After washing the cheese collect it to a ball using the cheese cloth and carefully squeeze it to take the water out. Do note that if you didn’t cooled it down enough with the tap water it might be very hot! be careful.
And now you’ve got a fresh home made Ricotta! a.k.a soft Paneer cheese. At this stage you can stop, spread it on bread, add to baked goodies, gravy dishes, sweets and many more. The cheese will stay good in the fridge for a few days (up to a week).
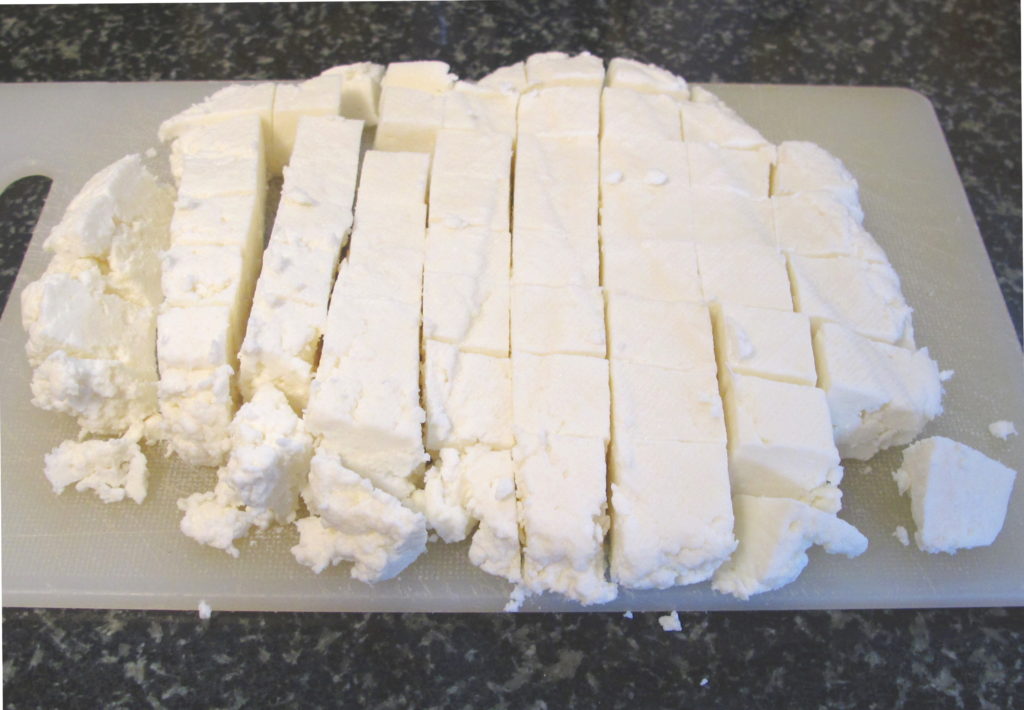
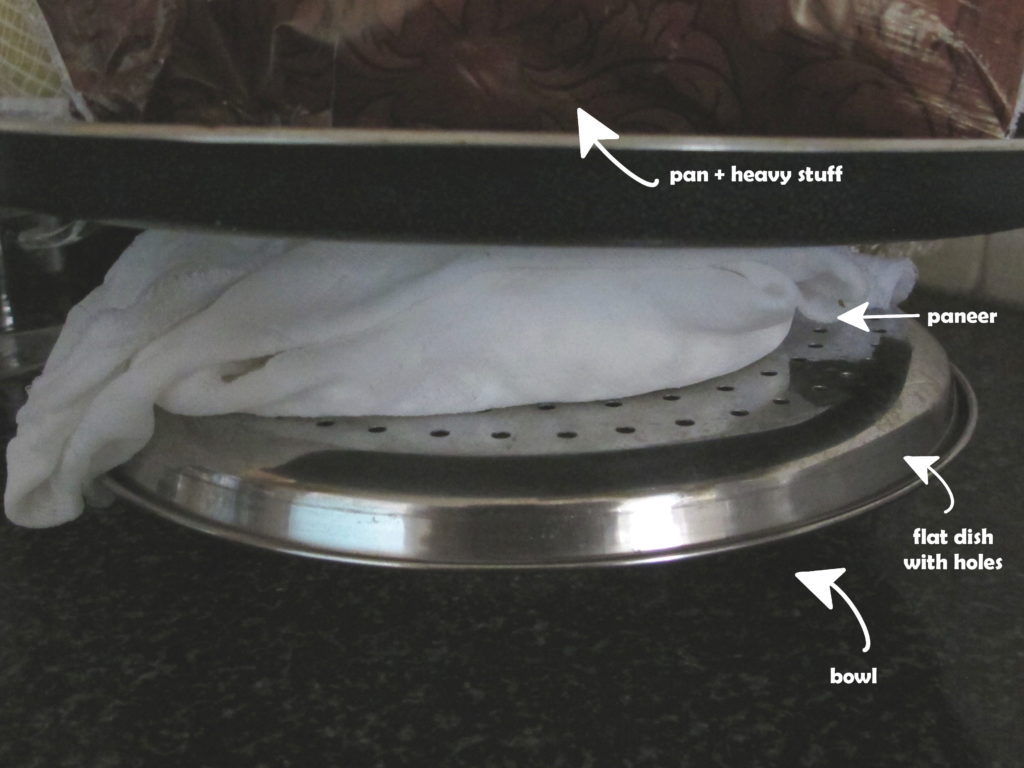
Craving chewy and fancy Paneer cubes? Gently wrap the cheese with the cloth and flatten it. Place on a flat dish with holes, set a flat plate or pan on top and place something(s) heavy on top. Those can be a bag of potatoes, a pan full of water or any other thing which is heavy and fits. If you don’t have a flat dish with wholes you can use two identical small baskets one inside the other and in between the cheese, or just use two flat plates. Let the cheese sit for at least half an hour and up to 3 hours. This process will make the cheese harder and take the liquid out so the longer you wait the cheese will be more firm.
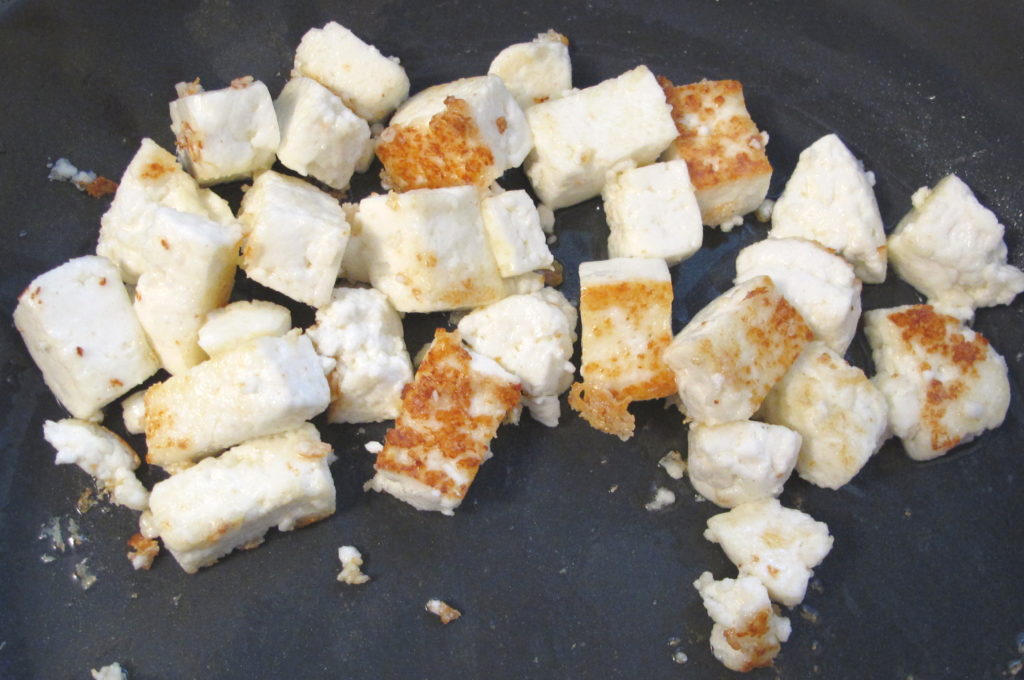
That’s it, the cheese is ready! You got a fresh a tasty Paneer cheese that just waits to be added to some hot and spicy Indian curry. You can eat the cheese now, store it in the fridge for few days or freeze for 2-3 months. If you choose to freeze the cheese I really recommend cutting it to small cubes and quickly fry it in open with some oil. This procedure will help the cheese keep both its flavor and texture and you’ll be able to add the frozen cubes to the dish you’re cooking without defrosting them.
Comments and suggestions
- Milk. I recommend using a simple 3% milk. Don’t use a low fat milk for this recipe. By the way, you can’t make Paneer from vegan “milk”, it just wouldn’t work. In my opinion the vegan substitute for Paneer is tofu.
- How do you I store it? as written above the soft Paneer can be kept for few days in the fridge (up to a week). The firm Paneer can be kept in the fridge for the same duration, or be frozen. If you freeze it cut it to cubes and fry it before freezing.
In short
Place 2 liter milk in a wide pan and bring to a boil on low-medium heat. Stir occasionally and make sure the milk doesn’t stick to the bottom and burn. Gradually add 1/4 cup lemon juice and stir. Wait for the milk to separate to cheese lumps and a greenish liquid (whey). Pour the pan content onto a strainer with a clean cheese cloth. Wash the cheese with cool tap water. Sprinkle some salt and mix gently (this is optional). Close the cloth and squeeze the water out. The soft Paneer is ready.
In case you want a firm Paneer cover the cheese in the cloth and flatten it. Place it on a flat dish with holes / a small basket / a plate. Cover with a flat plate or a pan on top and place heavy objects on top of the plate. Let it sit for half an hour up to 3 hours. The firm Paneer is ready.